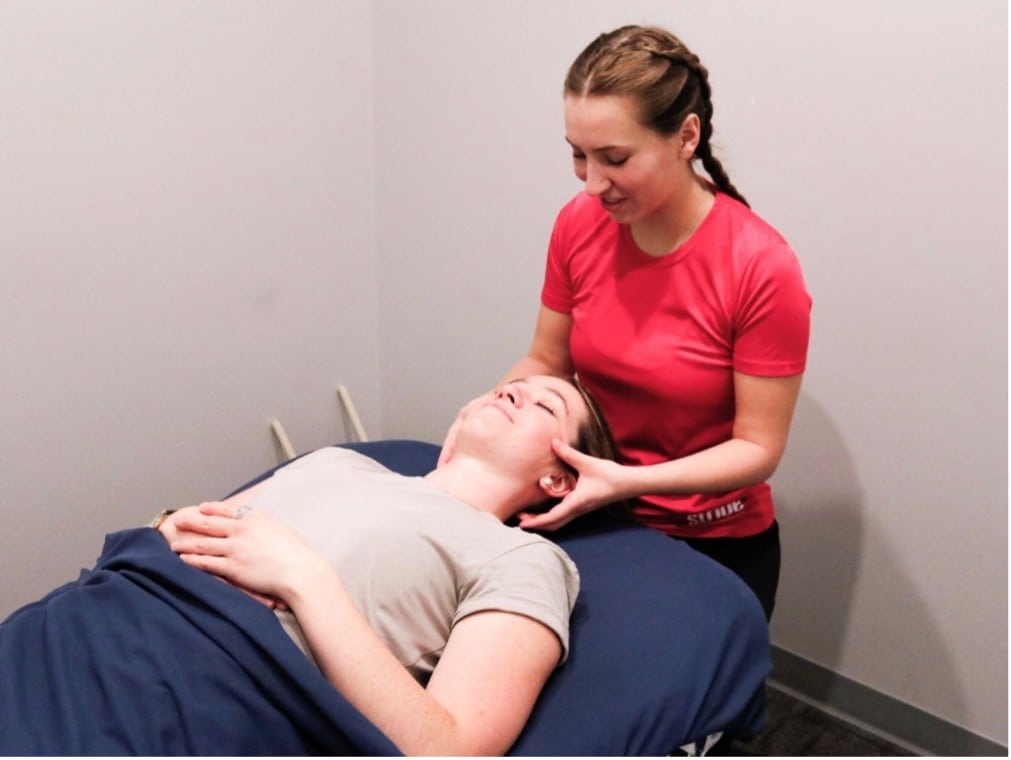
The Spring Loaded Knee Brace at Stride Physiotherapy

The Spring Loaded Knee Brace (OA Brace)
Now at Stride Physiotherapy in Red Deer

Stride Physiotherapy is excited to announce we now have the Spring Loaded Knee Brace! This osteoarthritis (OA) knee brace has changed the way we manage knee injuries and mobility issues. It can really help you if you are suffering from osteoarthritis pain or pain on the front of your knee. We also love this brace due to its ability to support athletes and workers who stand on their feet all day.


This Knee Brace Stands Out

The Spring Loaded OA Knee Brace is currently the only brace on the market of its kind. This is due to its use of spring technology, rather than straps, to provide users support. The OA brace can address arthritis, meniscus injuries, ligament pain, and more. Today we’re sharing all about this brace! Keep reading to learn about its features and benefits, and what makes this brace stand out. Check it out!

Bending with Spring Loaded Knee Brace
Image courtesy of Spring Loaded


The Spring Loaded Knee Brace: An Overview

The Spring Loaded Knee Brace, developed by Spring Loaded Technology, is the result of medical science and engineering. This unique OA knee brace is designed to improve your mobility, reduce your pain, and provide support. In essence, it’s a remarkable device made to assist anyone with varying knee conditions. Given that it uses spring technology, it offers excellent support to the knee joint, thus making it a cut above the rest.

Stride OA Brace Spring Loaded Brace Statistics
Statistics Courtesy of Spring Loaded

Key Features of the Spring Loaded Knee Brace (OA Brace)

Bionic Spring Technology

This brace intelligently adjusts to your movements, and supports your natural movement as a result. This dynamic interaction between the brace and your knee can yield a more comfortable and functional experience.

Customizable Support

This supportive tool is not a one-size-fits-all solution. It can be adjusted to accommodate various activity levels and knee conditions. As a result, it is versatile and adaptable for a wide range of users.

Enhanced Mobility

Although traditional knee braces are popular, they are rigid and not always effective. In contrast, this brace uses spring technology to help you flex and extend your knee. Consequently, you can enjoy a seamless transition between walking, running, and bending.

Pain Reduction

This brace evenly distributes pressure across the knee joint, which allows users to experience less pain. According to this study, 60% of wearers decreased their use of injections, walking aids, or other health services.

Innovative Design

Due to a sleek and smart design, your brace can be worn discreetly under your clothes. Lightweight construction prevents added bulkiness, but does not lower its therapeutic benefits.


Benefits of the Spring Loaded Knee Brace (OA Brace)

Supports Recovery

For those recovering from knee injuries or surgeries, this brace is a game changer. In particular, its dynamic support helps your natural movement so you can regain your mobility and strength safely.

Active Lifestyle

Unfortunately, knee pain or injuries often stop people from participating in the activities they love. Following the use of this brace, you can enjoy a more active lifestyle without as much pain holding you back like it used to.

Chronic Condition Management

Of course, if you have a chronic knee condition like osteoarthritis, you can manage it easier with the brace. Its customizable support coupled with pain-reducing properties contribute to an improved quality of life.

Preventive Care

Furthermore, this brace helps prevent injuries for many people! Athletes, fitness enthusiasts, and individuals in physically demanding professions can benefit from the added support!

Spring Loaded Knee Brace
Image courtesy of Spring Loaded

Find Your Brace

To sum it up, this brace is a game-changer for a wide range of users. If flexible comfort and mobility is what you need, then this brace is for you!

Whether you need support for recovery, active living, or preventive care, call Stride Physiotherapy today at 403-343-8891 to see if this device is right for you!

Sinus Headaches: Massage Techniques for Relief

Sinus headache relief massages

Sinus Headaches: Three At-Home Massage Techniques for Relief
By: Prism Saswirsky, Registered Massage Therapist

As Spring approaches, you may find you’re experiencing more headaches than usual. This can be attributed to sinus headaches, which sometimes result from the increased allergens in the air. Sinus headaches are not only caused by allergies, but also many other sources of nasal congestion.

What Are Sinus Headaches?

Sinuses are air-filled spaces inside your cheekbones, forehead and behind the bridge of your nose. Usually, the sinuses become inflamed due to allergies or infection, causing your sinuses to make more mucous. Mucous buildup causes a blockage in your sinuses’ channels, which drain your mucous. The resulting pressure in the sinuses can cause the pain that feels like a headache.

What Do Sinus Headaches Feel Like?

A sinus headache may present as some of the symptoms listed below:

  • Congested or runny nose
  • Achy feeling in the upper teeth
  • Pressure, fullness and/or pain around the eyes, eyebrows, forehead, bridge of the nose and/or cheeks
  • Tenderness when touching the face
  • Fatigue

    What Causes Sinus Headaches?

There are many different causes for sinus headaches. Some of the causes of sinus headaches are:

  • Allergies
  • The common cold
  • A deviated septum
  • Nasal polyps
  • Infections

Now that we are familiar with sinus headaches, let’s dig a little deeper into tips for how to drain your sinuses when you have this type of headache, as well as self-massage techniques that you can try at home to relieve some pressure.

The Sequence for Sinus Drainage Massage:

  1. Facial Steam: Start by boiling water, and pouring it into a separate Rest a towel over the back of your head, lean over the bowl, and inhale the steam. Maintain at least six inches of distance from the water to avoid burns.
  2. Sinus Massage: With the end of your fingertips, start with quick, light, taps around your cheeks, temples, eyebrows, and forehead. Then choose a specific area to start on. (More below.)

There are different areas of sinuses, and one or more may be clogged at the same time. Here is a breakdown of those areas and the steps for how to decongest them for sinus headache relief.

Image of sinus channels for massage

1. Frontal Sinuses
  • Place your index and middle fingers in the middle at the top of your forehead.
  • Move your fingers outward to your temples.
  • Bring your fingers back to the centre, placed slightly lower than before and repeat the motion.
  • Continue these steps until you move your fingers across the eyebrows.
  • You can also do these steps with a circular motion.

[frontal sinus massage start position]
Start position.
[frontal sinus massage end position]
End position.

 2. Ethnoid/Sphenoid Sinuses
  • Place your thumbs right under your eyebrow, beside either side of your nose; you should feel a little socket right above your eyes.
  • Apply light pressure in that gap.
  • Move your thumbs outwards until you feel another little notch and apply pressure again for a few seconds. This notch is less prominent than the first.
  • Move thumbs outward again, towards the end of your eyebrows. You should feel a third little notch; apply Again, this notch is less prominent than the first.
  • Place your index and middle fingers on both sides of your temples.
  • Massage in circular motion then lightly stroke downwards.
  • Place your index and middle finger on either side of the bridge of your nose. (Between your eyes.)
  • Massage in circular motion, or you can hold the pressure and slowly move down the nose.

[ethnoid sinus headache massage]
Start position.
[ethnoid sinus headache massage end position]
End position.

3. Maxillary Sinuses
  • Place your middle and index fingers on either side of your nose, and on your cheekbones right under the eyes.
  • Do a soft stroke outward to your ears. You can also do this in circular motions.
  • Move down between your cheekbones and upper jaw and repeat.
  • For stronger pressure you can use your thumbs.

Maxillary sinus end position

Sinus headaches are quite common. If you need additional information, or help with your sinus headaches, please feel free to reach out to one of our team members at Stride!


Pelvic Pain During Pregnancy: Is it Common?

Pelvic Pain During Pregnancy: Is it Common?

By: Jen Goehring, Physiotherapist

Pregnancy can be a wonderful time for many women, but it can also come with its fair share of aches and pains. One of the most common complaints pelvic physiotherapists hear among pregnant women is pelvic pain. In fact, 1 in 5 women who are pregnant will experience pelvic pain during some part of their pregnancy. The good news is that pelvic physio provides many treatments, activity modifications, and key exercises that can assist you in navigating your pregnancy pelvic pain.

What Are the Causes of Pelvic Pain During Pregnancy?

Although the exact reason for pelvic pain during pregnancy is unknown, there are a few factors that may contribute. These include:

  1. Pubic Symphysis Dysfunction (SPD)

Pain on the front of the pelvis can occur if the pelvic joints become misaligned or unstable, which is common during pregnancy. Pubic Symphysis Dysfunction often presents as a sharp pain with things like walking, climbing stairs, rolling in bed, or standing on one leg to put shoes on. Clicking, grinding, and popping may also occur.

  1. Pelvic Girdle Pain (PGP)

Pelvic Girdle Pain is another common cause of pelvic pain during pregnancy. It can present as pain in the lower back, hips, and pelvis which can make it difficult to walk, move around, and perform daily activities.

  1. Round Ligament Pain

Round ligament pain occurs during different stages of pregnancy where the ligaments that support the uterus stretch, pull, and expand. Round ligament pain can cause sharp, stabbing, or dull pain on one or both sides of the lower abdomen. It can also feel like strong Braxton Hicks contractions.

There are other causes of discomfort in the pelvis during pregnancy. If you’re ever concerned about your pregnancy or the level of pain you are experiencing, please reach out to your doctor directly. If it is not an emergency, contact us for a pelvic health assessment with one of our physiotherapists.

What Are the Common Symptoms of Pelvic Pain During Pregnancy?

While pelvic pain can be uncomfortable, it is typically not a cause for concern. The following are common symptoms you might experience if you have pelvic pain during pregnancy.

  • Pain around your pubic symphysis
  • Clicking, grinding, or popping in your pubic area
  • Lower back pain that may radiate into one of your legs
  • Deep pain or pressure around your perineum
  • Pain in your thighs or groin area

Four Tips to Reduce Pelvic Pain During Pregnancy

Treatment options for this kind of pain can vary, so it is important to speak with your physiotherapist to determine the best plan for you. Some ideas that might help alleviate pelvic pain during pregnancy are:

  1. Heat: Using a heating pad on the pelvic area can help to relax muscle tension and reduce pain. Taking a warm shower or bath may also help.
  2. Rest: Rest when you are able. If rest isn’t an option, then modifying activities that are painful may help. This would include: equipment support, postural changes, or focused exercises. Sit to put your shoes on, avoid carrying heavy things on one side of the body, or reduce the time spent on your feet.
  3. Belt: A SI joint belt can be very helpful for lower back or pubic pain, especially with walking and standing.
  4. Pregnancy Pillow: A pregnancy pillow can provide support to the lower back and pelvic area while resting or sleeping.

Four Exercises to Reduce Pelvic Pain During Pregnancy

The four exercises below are designed to help reduce pain in the pelvic area. The goal of each of these exercises is to promote force closure of the pelvis. This means that we are working on engaging all of the muscles around the pelvis to provide stability to the pelvis and reduce pain with movement.

1. Cat-Cow Exercise

  • Start on your hands and knees with your wrists under your shoulders.
  • Arch your back lifting your head up and pushing your tailbone out. Hold this position for 5-10 seconds.
  • Bend your back by tucking your head and tailbone in, making a curve in your back. Hold this position for 5-10 seconds.
  • Repeat 10 times.
 2. Bridge

Bridge post 1 for pelvic painBridge pose 2 for pelvic pain

  • Lie on your back with your knees bent and your feet flat on the floor.
  • Take a block or ball and squeeze it between your knees (you are welcome to go without the block if you prefer as shown in the first picture).
  • Maintaining the squeeze on the block or ball, lift your hips up keeping them level. Hold for 1-2 seconds. (Try not to hyper-extend through your back.)
  • Lower down to your starting position.
  • Repeat 3 sets of 8 repetitions.
3. Butterfly

Butterfly pose for pelvic pain

  • Lie on your back and bend both of your knees up. Slowly open your hips, dropping both knees out to the sides and bringing the soles of your feet together.
  • Ensure you squeeze your buttock muscles in this open position. Hold for 10 seconds.
  • Repeat 3-5 times.
  • Once the stretch is complete, straighten your legs out. 
4. Squat

Squat exercise to relieve pelvic pain

  • With your feet shoulder width apart, place a small block or ball between your knees and gently squeeze it.
  • Squat down, dropping your hips towards the floor and bending your knees.
  • Stand back up, ensuring you continue to squeeze the ball or block and squeeze your buttock muscles.
  • Repeat 3 sets of 8 repetitions.

If you continue to experience pelvic pain during pregnancy, feel free to book a Pelvic Health Assessment with our physiotherapist, Jen by clicking here.


The Proper Squat Form: Learn How to Do it Right!

squat with proper form

The Proper Squat Form: Learn How to Do it Right!

By Eric Walper, Physiotherapist

I’m excited that you’re ready to take your mobility and strength to the next level, and learn the do’s and don’ts of a proper squat. Often referred to as the holy grail of exercises, the squat is a time-honored functional movement that will help prepare your body for daily functions. So to get started, learn the proper squat form!

Want to jump higher? Squat. Get off the ground easier? Squat. Pick up your kids without pain? Squat. It’s safe to say that when it comes to rehabilitation, a squat often finds its place in just about every physiotherapist’s wheelhouse.

Starting Point: The Body Weight Squat

While weighted squats are great for developing strength, there is no need to be intimidated by the movement. It’s important to have proper form for a bodyweight squat first.

How to Complete a Bodyweight Squat

  1. Stand with your feet shoulder-width apart with your arms resting at your sides.
  2. Brace your core and keep a proud posture. (Shoulders back and chest up). When in posture, begin pushing your hips back and bending your knees as if you’re going to sit down in a chair. Ensure your knees do not cave in, and that they do not travel too far forward past your feet.
  3. When your thighs are parallel to the floor, or you have reached the lowest comfortable position without breaking form,  pause.
  4. Push up evenly with both feet against the floor, drive your knees out, and return to the starting position. After a brief pause, you can repeat the exercise.

Common Mistakes to Avoid with Squat Form

  1. Avoid letting your knees cave in: Always make sure your knees are traveling toward or slightly outside your feet, and not any further.
  2. Avoid allowing your knees to move over your toes excessively: Initiate the movement with the hips, and imagine you are sitting back on to a chair to avoid your knees traveling over your toes.
  3. Avoid lifting your heels: This is often an indicator of poor ankle and hip mobility. Do not let your heels lift off the ground. If you find your heels lifting up, feel free to seek some treatment from one of our physiotherapists by clicking here.

Proper squat form example

There you have it; the ABCs of a proper bodyweight squat. What are you waiting for? Stand up and give it a try! Remember, the bodyweight squat is an essential movement that paves the way for all other squat variations including barbell squats. When you keep your form, your squats will be effective!

Still have questions? Book an appointment with me at Stride in Red Deer by clicking here! As a result, you can build your squat strength and improve your technique!

Physiotherapy for a Child: Is This Treatment Right for Yours?

Physiotherapy for a child and infant!

Physiotherapy for a Child: Is This Treatment Right for Yours?

By Devan Mercereau, Physiotherapist

Physiotherapy for a child is more common than you think! This is often called “Paediatric Physiotherapy.” It assesses and treats children ages 0-18 years old. At Stride, our treatments for infants and children vary depending on their conditions and concerns. Your Paediatric Physiotherapist will go through a full assessment with your child and then based on the diagnosis, choose a treatment. Possible treatments include:

  • Soft tissue work
  • Facilitation of movements and positions
  • Alternative strategies to increase the efficiency of movements
  • Taping
  • Modalities
  • Plenty of education

Signs Your Child May Need Paediatric Physiotherapy

Let’s take a closer look by breaking the age groups down into infants, toddlers, children, and teens:

How Do You Know If Your Infant Needs Physiotherapy?

Physiotherapy for a child is not just for them, but also for their parents! Throughout the first year of life, there are a lot of changes infants go through. The developmental milestones are important at each stage to help with ease of movement, increase independence, and improve coordination later in life. So why might you choose physiotherapy for a child? Some reasons may include:

#1: Developmental Delay

If you are noticing that your infant is behind on their milestones, or is “stuck” at a stage, Paediatric Physiotherapy can help! As a reminder, here is a link to the developmental milestones that most infants hit within the first two years of their life. Milestones that physiotherapy can help with include:

  • Holding their head up
  • Rolling over
  • Sitting
  • Crawling
  • Standing and walking

Along with developmental delays, babies sometimes favour one direction or position over another. For example: rolling in one direction, preferring propped sitting, decreased tummy time tolerance, and more. It is important to help facilitate infants in all positions and direction, which will increase body awareness and coordination.

Physiotherapy for a child, teen, and even a baby

If you are noticing any of these things with your child for more than 3-4 weeks, your child’s physiotherapist can help with strategies that aim to facilitate movements. As a result, you can learn more about how to help your child at home.

#2: Head Shape

Are you noticing flattening on the back of your child’s head, or on one side? This is often from the infant spending more time on their back or laying on one side a lot. For this purpose, you should seek advice from a physiotherapist around the 3-4 month age to help with alternative positioning and education.

A child receiving physiotherapy

When Should Toddlers and Children See a Physiotherapist?

Toddlers and children can be clumsy and uncoordinated. Knowing this, it’s important to look at the overall alignment of limbs, strength, and coordination of movements. To do so, pay close attention to how your child plays, walks, runs, and skips. If you have any concerns with the above, especially for 3 months or longer, seek a physiotherapist for your child. If you notice your child displaying atypical patterns more than 20% of the time, or has troubles with constipation or bedwetting, these are also good reasons to seek a physiotherapist.

Physiotherapy for a child and toddler

School Age/Teens

Paediatric Physiotherapy can help with a lot of things for school-aged children and teenagers. Our physiotherapists can help with general injuries, sports related injuries, and age or growth-related conditions.

#1: General Injuries or Sports Related Injuries

It is important to address injuries in childhood and adolescence to help decrease compensatory patterns as we age. A compensatory pattern is basically when your child relies too much on one limb to make up for the lack of functioning in another. By rehabilitating these injuries early on, your teen’s body can move more efficiently over time.

If your child has an injury or complaint, see a physiotherapist! They will use non-invasive treatments, such as soft tissue work, modalities, and exercises.

#2: Age and Growth-Related Conditions

If your child is complaining of targeted pain in the heel or just below the kneecap, these can be growth-related conditions. Two of the conditions we look at are Sever’s Disease or Osgood-Schlatter’s. By determining the cause of pain, we can help decrease pain and improve function through specific exercises and treatment.

If you have any questions about trying physiotherapy for a child, click here to book online with one of our physiotherapists. We are happy to help your child through treatments just for them, whether they are an infant or budding athlete!

Osteoarthritis Treatment Options: Things to Start Today

Osteoarthritis Treatment Options: Things to Start Today

By: Julia Towers, Physiotherapist

Do you have achy, swollen, or creaky joints? Are you waking up in the morning feeling like the Tin Man? If so, these symptoms may be impacting your ability to participate in the activities you love, which can be very frustrating! So let’s talk about osteoarthritis and review some strategies for managing this common yet pesky condition.

What is Osteoarthritis?

Osteoarthritis occurs when the cartilage lining of a joint breaks down over time. Normally, healthy articular cartilage protects bones and provides a smooth surface for the joint to glide comfortably. But when there is wear on the cartilage, the joint can’t move as well as it should, which causes swelling and pain. Even further, small spurs (called osteophytes) sometimes form, which makes the joint more irritable.

Osteoarthritis is most common in the knees, hips, lower back, neck, fingers, and toes. Your doctor will often start by ordering an X-ray to confirm the arthritic changes. While important to have, these X-rays are not required to get started on treatment. Let’s talk about why that’s the case.

You Have Osteoarthritis. Now What?

There is more to do than just wait for surgery, which is good! Often the wait can be long for a joint replacement. There are many things that you can start right away that are beneficial regardless of whether you need surgery. So what do you do for this chronic condition?

Conservative Treatment For Osteoarthritis


Physiotherapy is a great place to start in the treatment of osteoarthritis. Your physiotherapist will educate you about your condition and come up with various joint protection strategies. Treatment will most likely include manual therapy to help reduce tension in your muscles and promote mobility in your joints. Additionally, an osteoarthritis treatment plan should always include exercises to help your range of motion, balance, cardiovascular training, and strengthening! These things may also help with weight management to assist in decreasing the pressure load on your joints.

Exercise is the bread and butter of osteoarthritis treatment.  The more support and stability you can provide your joints, the less likely your symptoms will stop you from the daily activities that you enjoy.

Examples of great strengthening exercises for your knees

#1: The Bridge

#2: Body-weight Squat

Additional Treatment Options for Osteoarthritis

A brace can help you get back to your activities as well. At Stride, we offer a variety of options to help. These include our Push braces for the thumb, wrist, knee, and back, as well as custom unloader knee bracing through DonJoy. Gait aids like a cane or walker may be recommended in some instances, too.

There are also different injections available for some cases of osteoarthritis. Here are some of the most common:

  • Corticosteroids (cortisone): This mimics the naturally occurring anti-inflammatory hormone in our bodies. Cortisone can be helpful for short term relief, lasting about three months. Cortisone also manages flare-ups in order for patients to use an exercise program, which will yield better long-term effects than the injection itself.
  • Visco-supplementation (ex. hyaluronic acid): This aims to lubricate the joint and reduce pain, which results in better movement.
  • Platelet-rich plasma (PRP): These injections draw blood from your body, and then a machine separates platelets from the rest of your blood. After this, the platelets are injected into the area of pain to inhibit inflammation, stimulate new cartilage formation, and increase natural lubrication. This treatment is appropriate for moderate osteoarthritis.

Although osteoarthritis is a disruptive condition that can take a toll, there is hope! No matter where you are on your journey with osteoarthritis, our physiotherapists are happy to work alongside you! To get started, click here to book an appointment online at our clinic.

Posture with Clinical Pilates: 4 Exercises to Try at Home

Posture with Clinical Pilates: 4 Exercises to Try at Home

By Chelsey Schwarzenberger, Physiotherapist

As we move into the colder months of the year, we spend more time indoors, which results in us sitting a lot. More sitting means more aches and pains in our neck and shoulders that weren’t there during active summer months. Oh, how we miss being more active and enjoying the hot weather!

For those knots between your shoulder blades and that tightness through your neck and chest, we suggest Clinical Pilates! Clinical Pilates is a form of physiotherapy-based exercise which focuses on muscle control, flexibility, and strength. This treatment is an effective way to increase your postural strength to better cope with sitting and other postural stressors.

Give these four Clinical Pilates exercises for posture a try at-home… you won’t regret it and might find that Clinical Pilates is right for you!

Four Clinical Pilates Exercises to Try

Exercise 1: Spine Twist

The Spine Twist exercise is beneficial for improving the movement in your upper back. Follow these steps for this Clinical Pilates exercise:

  • Start by sitting cross-legged, with your head tall and your arms bent and stacked in front of you.
  • Draw your abdominal muscles gently inwards towards your spine and take a breath in.
  • As you breathe out, keep your hips still and rotate your torso to the left, until you feel a stretch through your middle back.
  • Take a breath in and hold this position, then exhale and return to the starting position.
  • Repeat this movement again, now moving to the right.
  • Complete this sequence 6 times per side.
Middle Position
Exercise 2: Breast Stroke Preparation

This Clinical Pilates exercise works on strengthening your neck and shoulder blade muscles.

  • Lie on your stomach with your forehead propped up on a rolled towel.
  • From here, gently draw in your abdominal muscles and squeeze your shoulder blades down and back like you are trying to pinch a grape between the lower part of your shoulder blades.
  • If step two felt easy and you don’t feel your shoulders creeping up towards your ears, you can repeat this but now hover your arms off the mat and gently float your head off the towel, keeping your neck long.
  • Hold each repetition for 5 seconds and repeat 10-20 times.
Starting Position
Middle Position
Exercise 3: Leg Pull Preparation

              The Leg Pull is a challenging Clinical Pilates exercise for your shoulder blades and core muscles.

  • Start on your hands and knees with your hands slightly ahead of your shoulders, then place your knees directly below your hips.
  • From here, gently squeeze your shoulder blades together and draw your abdominal muscles up and in,  keeping your lower back flat.
  • As you exhale, hover your knees off the floor by a few centimetres. Keep the rest of your body still and your neck long.
  • As you inhale, hold this position.
  • As you exhale, lower your knees back to the mat.
  • Repeat this 10 times, ensuring you keep your back flat and your shoulder blades squeezed throughout the exercise.
Starting Position     
Middle Position
Exercise 4: Arm Openings

              For the fourth exercise we have the Arm Openings Clinical Pilates which is beneficial for your upper back and chest muscles.

  • Lie on your side with your head supported on a pillow with your knees stacked and bent to 90 degrees. Then rest your arms in front of you.
  • As you breathe out, take your top arm and reach towards the ceiling and then out to the side. Open through your chest and let your head move gently with you.
  • When you feel a stretch through your chest or back, hold this position and take a deep breath in.
  • As you breathe out, return back to the starting position.
  • Complete this 6 times
  • Repeat on the opposite side.
Starting Position
Middle Position

*Please note: not all exercises are appropriate for all people. If you feel dizzy, have increased pain, or have troubles breathing while completing these exercises, please stop the exercise. Then consult with a medical professional. If you have a history of chronic neck, shoulder or lower back pain, it is recommended to see a physiotherapist first and ensure the most appropriate exercises are prescribed for your condition. ***

I hope you give these Clinical Pilates exercises a try to help with your posture. Doing these exercises once per day or mixing them up throughout your day can be helpful to keep your body moving well and feeling great! If you are interested in learning more about Clinical Pilates, please give us a call at 403-343-8891. Our Clinical Pilates Physiotherapist in Red Deer would be happy to help you feel stronger and move better. You can also click here to book with her.

Concussion Symptoms: How to Recognize a Concussion

Concussion Symptoms: How to Recognize a Concussion

By: Laurin Walton, Physiotherapist

Why Early Recognition and Treatment of Concussion is Important

Being able to recognize concussion symptoms can result in determining when a concussion may have occurred. This information is important for getting a person the care they need. Whether this person is your teammate, your child, or yourself, these tools can help. Only a qualified medical professional can diagnose a concussion, but anyone can learn how to identify concussion symptoms. Early recognition of symptoms and prompt treatment of concussions can help improve a person’s recovery. I believe that knowledge is power, and I want to give you the tools to identify a concussion!

Guidance From the Experts

Every 4 years (except during the COVID-19 pandemic), an international group of concussion experts get together to create a consensus statement that reflects the most up-to-date research on concussion. They have also created the Concussion Recognition Tool 5 (CRT5), which helps non-medical professionals identify when a concussion may have occurred.

Concussion recognition and symptoms
Davis GA, et al. Br J Sports Med 2017;0:1. doi:10.1136/bjsports-2017-097508CRT5

The CRT5 will help you identify red flags that would indicate emergent medical attention. It will also provide guidance to recognize a possible concussion, concussion symptoms, and information on what you need to do next. Check out the Concussion Recognition Tool 5 (CRT5) above.

Click here for your own copy of the Concussion Recognition Tool 5, which was developed by the Concussion in Sport Group. Keep a copy of it handy on your phone or print a copy for your sports bag.

Takeaways From the Concussion Recognition Tool 5 (CRT5)

  • Check for red flags and get emergent medical help if red flags are present.
  • Use the guidelines to identify a possible concussion and concussion symptoms.
  • If you suspect a concussion, stop all activity. You or your person cannot continue until examined by a qualified medical professional.
  • Follow the guidance for care provided on the CRT5 if you suspect a concussion.
  • Book an appointment with a physiotherapist or another qualified medical professional.

If no red flags are identified by using the CRT5, it is still beneficial to get a concussion assessment. Because I have taken many courses to further my concussion training, you can book an assessment with me. You can also see one of our other qualified physiotherapists. Start by clicking here.

What Does a Concussion Assessment with a Physiotherapist Look Like?

    • We will ask you questions about your injury and assess how you are currently feeling. Then we will look at any of your history that may be relevant to your current condition.
    • We complete a physical assessment that includes a neurological screen. There are other areas that may be affected. (Neck, eyes, inner ear, balance, etc.)
    • We determine a specific treatment based on the findings of the assessment.
    • We will provide personalized education and a plan to help you know what you can do for your recovery, which will help get you back to your activities safely.

Concussion symptoms assessment


If you are in a situation where you think someone has sustained a concussion, the CRT5 will guide you through what to look for and what to do. I hope it helps you feel more prepared to deal with these stressful situations. When in doubt, book a physiotherapy appointment with me at Stride by clicking here and I can help solve your concussion questions and problems!

**Disclaimer: The above information is not a replacement for the advice of a qualified medical professional for your specific case. This blog is not for the purpose of diagnosing a concussion.**

What is Vestibular Rehabilitation?

What is Vestibular Rehabilitation?

By Darwin Paulraj, Physiotherapist

Vestibular Rehabilitation is a form of physiotherapy that is designed to relieve symptoms caused by disorders of the inner ear. Our vestibular physiotherapist looks at three main areas, such as unilateral (one-sided) and bilateral (double-sided) vestibular hypo-function, central vestibular disorders, and the most common type of vertigo: benign paroxysmal positional vertigo (BPPV).

Common symptoms that people experience are feeling dizzy, having trouble focusing, feeling off balance, and falling. In the long run, recovery relies on many factors, such as your activity level, level of pain, any medical conditions you have, and emotional concerns.

What is the Vestibular System?

Good question! Your vestibular system is located in your inner ear. This system is all about balance, controlling your movement, and knowing where things are in relation to your body. All in all, the vestibular system keeps you standing upright and moving forward! This major system consists of three components:

  1. The visual system
  2. The vestibular apparatus of the inner ear
  3. The somatosensory system

The vestibular apparatus is a system located inside your inner ear. It is responsible for sensing gravity and the space around you. It has five sensory organs, which include three semicircular canals, and two otolith organs. These organs are called the utricle and the saccule, and they are responsible for your spatial awareness. In summary, this tiny system is crucial for keeping you from knocking into objects and falling over.

Who Can Benefit from Vestibular Rehabilitation?

Patients who are experiencing the following symptoms may be good candidates for Vestibular Rehabilitation. Check out the list below and then see if any of these apply to you!

  • Headaches
  • Nausea
  • Vomiting
  • Dizziness
  • Vertigo
  • Neck aches
  • Light-headedness
  • Shakiness
  • Swaying
  • Spinning
  • Sensations of “fullness” or “pressure” in the ears
  • Sudden hearing loss
  • Loss of balance

What Does an Appointment with Our Vestibular Physiotherapist Include?

Before your first visit, you will fill out a few questions to help us decide if vestibular rehabilitation is a good fit for your needs. Afterwards, you will meet your vestibular physiotherapist! They will perform a few tests specifically to narrow down your list of potential issues. Here is what to expect.

  • Firstly, they will use vestibular goggles to examine how well you can control your eye movements. These funny goggles are important for testing vision.
  • Secondly, your therapist will ask you to walk around and move a bunch. This is going to help you two figure out what’s going on with your balance.
  • Thirdly, they will look over your test results with you, which will help you learn more about what’s going on.
  • Fourthly, they will provide you with an exercise therapy plan that you will then take home.

In conclusion, following your treatment plan is crucial for you to recover as smoothly as you can. Our goal is to help you feel better and stand tall. Literally!

If you feel like this hits close to home,  book an appointment with us today by calling 403-343-8891. You can also book with us online here.

Instrument Assisted Soft Tissue Mobilization: Picking the Best Tool for You

Instrument Assisted Soft Tissue Mobilization: Picking the Best Tool for You

By Nadia Lessard, Registered Massage Therapist

Recently, the Health Industry has seen a huge influx of home recovery tools. Just to name a few, we have foam rollers, lacrosse balls, suction cups, and massage guns. All of these tools are very accessible and easy to use. Now, there is a new addition to the recovery team: Instrument Assisted Soft Tissue Mobilization (IASTM) tools.

Without a doubt, our favourite tools are the Sidekick Tools.

The Sidekick Tools are IASTM tools, also known as muscle scrapers. They are designed to increase blood flow to a painful area while also improving your recovery. The Sidekick Tools are very similar to Gua Sha, which is a traditional Chinese healing method that has been used to treat chronic pain. Stride Physiotherapy in Red Deer recently started carrying Sidekick Tools! The models we carry include: the Curve, the Echo, the Eclipse, and the Bow.

Each Sidekick tool varies in size, shape, and material. Specific body parts require specific tools, and so do different treatments. These are not one-tool-fits-all for soft tissue mobilization! However, the Sidekick Tools all have the same therapeutic effects:

  • Increased range of motion
  • Relieve tension or stiffness
  • Reduce pain
  • Improve recovery time

Let’s take a look at each individual muscle scraping tool to see which one is best for you!

The Curve Sidekick Tool

The Curve Sidekick Tool is made of Bian stone. The stone makes it a bit more budget-friendly, and it is comfortable when you glide it on your skin. However, the stone makes the tool more delicate and easier to break. We still love it, though! As a Registered Massage Therapist, I recommend the Curve to people with tight shoulders or neck muscles. I used to show patients how to use a lacrosse ball to massage their neck and shoulders, but those areas can be a little tricky to reach. The Curve is an alternative. It is the perfect size to treat these smaller areas easily and with minimal effort.

The Echo Sidekick Tool

The Echo is a similar shape to the Curve, but its edges are different in size, and it is made of stainless steel. Due to the stainless steel material, it is heavier than the Curve, which makes it a little more aggressive on the skin. The Echo can be used for arm pain, neck and shoulder issues, knee pain, and is also great to use prior to any activity to prevent injuries. Some common conditions that the Echo can help treat are:

  • Golfer’s elbow
  • Tennis elbow
  • Neck and shoulder pain
  • IT band issues
  • Back tightness
  • Plantar fasciitis

The Eclipse Sidekick Tool

The Eclipse is the perfect IASTM tool to treat smaller areas, specifically the feet and calves. Many of us have suffered from plantar fasciitis or shin splints over the years. But these conditions don’t always surface due to fitness injuries. Things like changing footwear or spending a lot of time standing can trigger the inflammation. Massaging your calves has been proven to help in the healing process of these conditions. A foam roller is often what I have recommended patients to use to reduce the symptoms, but if you are looking for a less awkward and physically demanding therapy, the Eclipse is your tool.

The Bow Sidekick Tool

The Bow is the largest of our Sidekick Tools. This tool is great for bigger areas such as the quads, hips, IT band, and hamstrings, which get a lot of work! I have seen it help with backs as well. The Bow provides a lot of coverage on a treatment area which can save you time and energy. The handles on either side of the Bow makes it easier to glide over these big areas. I would recommend this one for anyone suffering from knee or hip pain.

How to Use Your Scraping Tool at Home

Now that you have learned about the different Sidekick Tools we carry, check out this quick video below to learn about how to use your scraping tool.

With all scraping tools, you want to use medium pressure on a painful area or areas of concern for a total of a few minutes. Additionally, seeing red on the skin is a great sign when using scraping tools!

In light of your budget and area of concern, one tool might suit your needs better than the others. If I were to recommend one Sidekick Tool, the Echo is by far my favorite. I have been carrying it everywhere I go. It is perfect for my neck, shoulders, quads, IT Bands, hips, low back, calves and plantar fascia. My Echo even came with me to a CrossFit competition! It fit inside my carry-on and made it through security without any problem!

I hope this helped you learn more about the family of Sidekick Tools. If you are looking to take a more active role in your recovery and health, grab one and try it for yourself! Stop by the clinic or book an appointment online with one of our Registered Massage Therapists to learn more by clicking here.