Bowen Therapy: a Beautiful Treatment

Bowen Therapy: a Beautiful Treatment

By: Krista Tait, Registered Massage Therapist

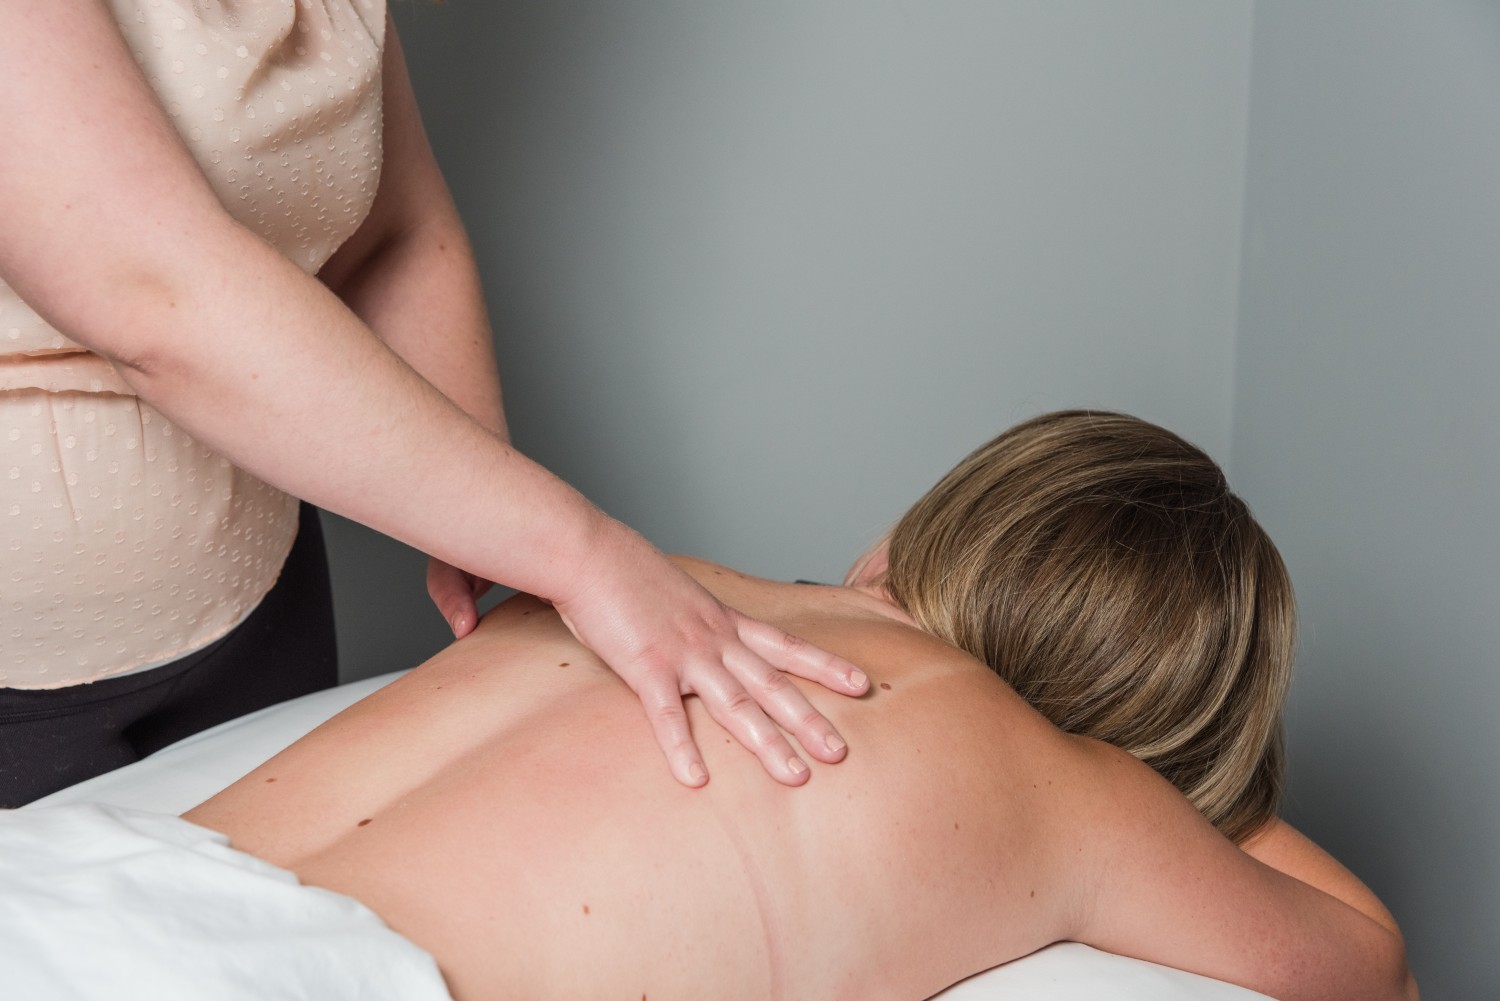
I’m Krista, one of Stride’s Massage Therapists. Today, I’m sharing about a special therapy that is part of my practice! While many of you may think about the more traditional forms of massage, you might not have heard about this one. So, let’s talk about Bowen Therapy, and then we’ll look at a variety of conditions it can help with. In the end, you might be surprised by what you learn!

What Is Bowen Therapy?

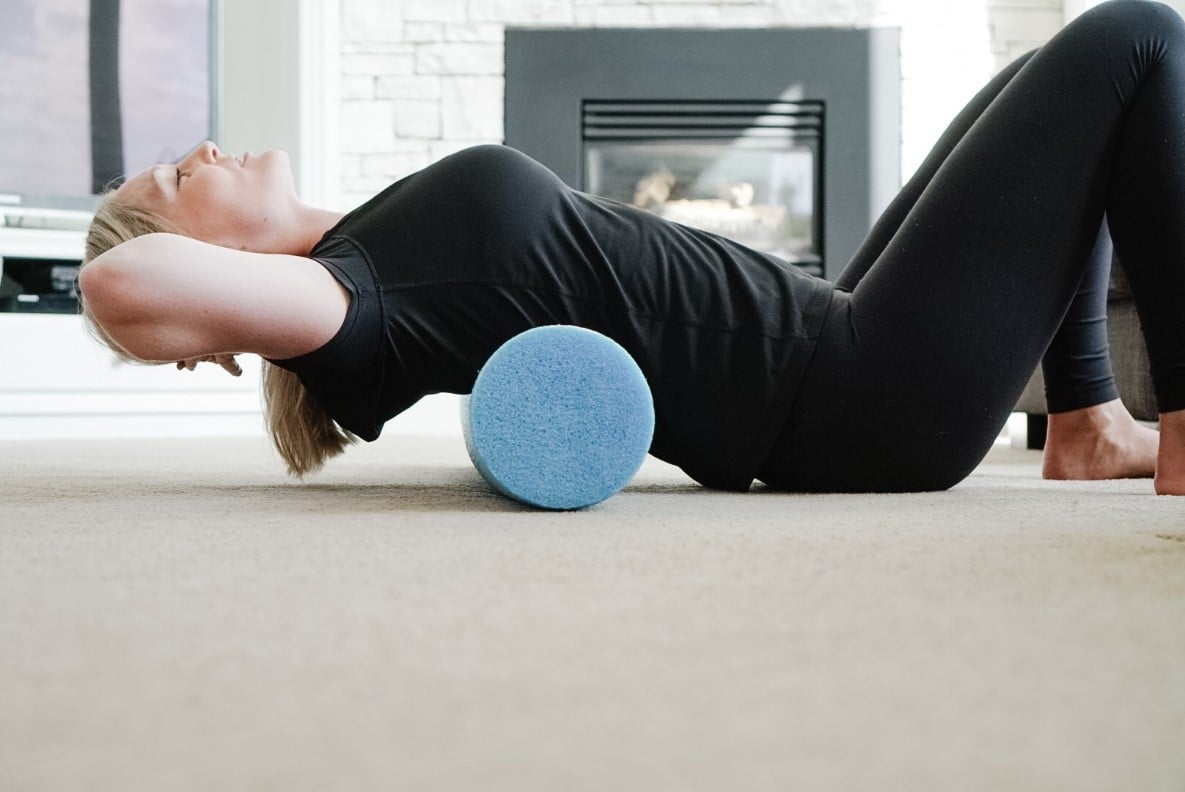
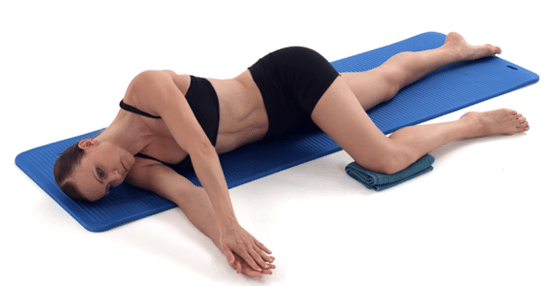
Bowen Therapy is based on the work of the Australian therapist, Tom Bowen. This is a massage technique that focuses on specific movements of muscle and connective tissue, in order to treat a wide range of conditions and injuries. Bowen Therapy addresses every system in the body, including internal organ systems, as well as the musculoskeletal structure. These gentle movements send neurological signals to the brain, which then responds with impulses that realign the body. Respecting the feedback loop between your brain and body is essential for your body to restore its own natural balance.

Who Can Bowen Therapy Help?

It is appropriate for all ages, from babies to the elderly. In brief, it is manual, gentle, and non-invasive!

What Conditions Does Bowen Therapy Treat?

Bowen Therapy often steps in when other modalities have failed. It provides significant relief to patients who suffer from the following symptoms:

      1. Muscular and skeletal problems in neck, shoulder, hip, knees, ankle and back. This includes sciatica, whiplash, and fibromyalgia.
      2. Frozen shoulder, tennis and golfer’s elbow, and carpal tunnel syndrome.
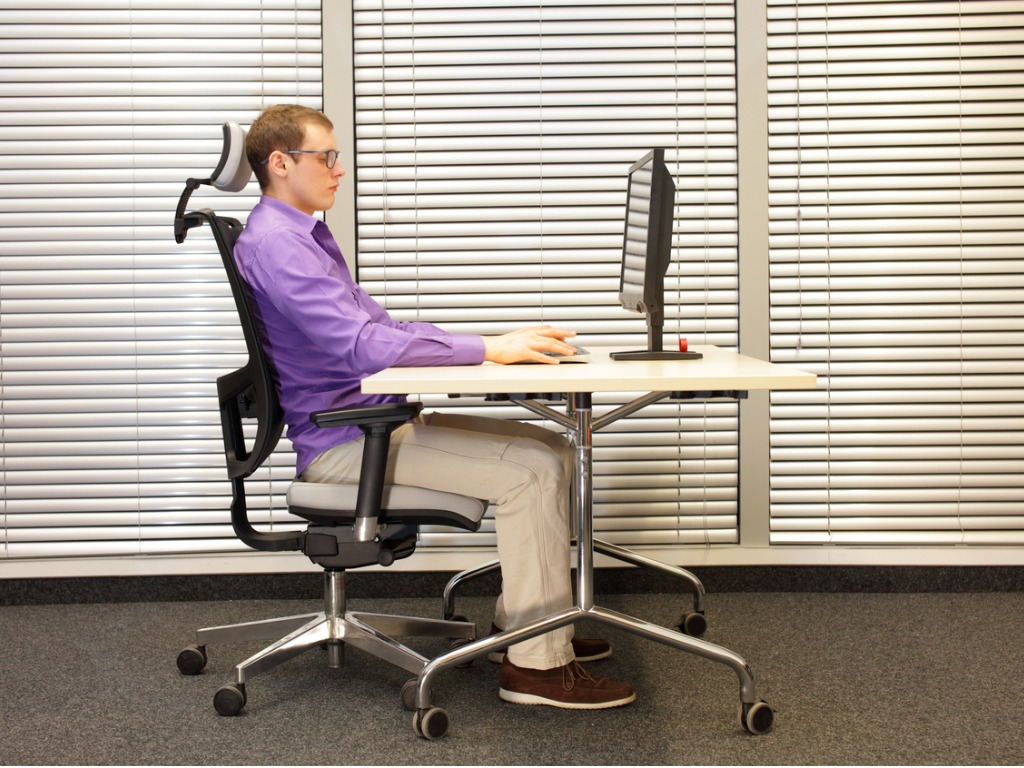
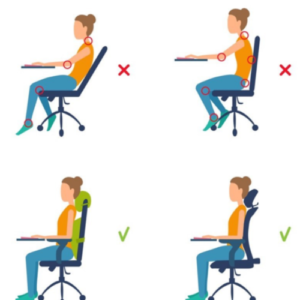
      3. Problems with posture and body alignment.
      4. Migraines and recurring headaches.
      5. Bell’s Palsy, Multiple Sclerosis, Parkinson’s Disease, and issues resulting from a stroke.
      6. Respiratory problems including asthma, bronchitis, and hay fever.
      7. Sports and work-related injuries.
      8. Digestive conditions, such as kidney problems, constipation, colic, IBS, indigestion, diverticulitis, colitis, and Crohn’s Disease.
      9. High blood pressure.
      10. Arthritis.
      11. Hormonal and gynaecological conditions. In essence, pregnancy and fertility problems, infertility (male and female), PMS, breast lumps, menopause, and more.
      12. Stress management, fatigue, and sleep problems.
      13. General relaxation.
      14. Pre-op and post-op recovery time.
      15. Bedwetting.
      16. Anxiety and depression.

What Does a Bowen Treatment Look Like?

Treatments are one hour long, and are conducted every 7-10 days. The body continues to process the treatments for 5-10 days after. In order to be effective, it is recommended that you do not see other practitioners until your entire treatment is complete.

How Many Visits do I Need?

Minor problems can be resolved in just one session with a massage therapist, compared to more complex problems that sometimes require 4-6 sessions. Additionally, some of these issues may require routine visits to help the body heal.

If you’re still wondering about this technique and others, feel free to give us a call. If this sounds right for you, then we invite you to book an appointment online by clicking here.

References

(1) Dr. Manon Bolliger ND, DHANP, RBHP (2008)

(2)Wanda Parks RMT, RNCP, RBHP (2008

Guest Blog: 6 Tips for Recovery After Rehabilitation

Guest Blog: 6 Tips to Recover After Rehabilitation

By: Brittany and Andrea, Founders of GymClass

Hi! We’re Brittany and Andrea, the Founders of GymClass! GymClass is our online fitness platform which we have created to combine our knowledge and training with our love of teaching, all for you. Today we’re discussing 6 tips for recovery after rehabilitation. We have designed this space as a fitness program where we take out all the guesswork and give you a progressive and intentional workout plan.

If your physiotherapist or doctor has given you the green light to start moving in recovery after rehabilitation, then we’ve got you covered. All you have to do is show up and follow along!

We were so thrilled when Jen asked us to do a guest blog post for Stride. Thanks for hangin’ with us for the next few minutes, and don’t forget to read to the bottom to discover our special deal!

What’s Next?

Do you want to know something crazy? Not everyone knows what it’s like to live pain free. If you haven’t experienced a proper functioning body, where you are moving well as a whole, you might not even know what it is like to feel that good! If you’ve never had to rehabilitate an injury, work on muscle imbalance, improve posture, or correct years of incorrect gait patterns, you’re lucky. You may not realize that movement is something we take for granted. In fact, movement is a gift to enjoy and work on every single day.

Many of you are reading this because you have a goal to create pain free movement in your daily lives. You work (or want to) with a physiotherapist to correct injuries and strengthen your body, in order to return to normal function. You’ve done all your sessions and your homework exercises, but now what?! You’ve started this beautiful journey, and we want to help you continue. Movement is self-love. Showing up for yourself is self-love. Prioritizing feeling good in your body is self-love.

Maybe you’re recovering from an injury, or starting a workout program for the first time. Maybe you are getting back to your regular exercise. Whatever you’re doing, it is important to build a strong foundation so you can continue to progress.

We have six principles that we use in GymClass that we want to share with you to help you build your strong base to move better!

(All of these principles are covered in our FoundationsClass series on our online platform).

Use Your Breath

We know this sounds simple, but it is one of the most overlooked components of exercise. Using your inhale and exhale properly helps to deepen your core work, keep your heart rate under control, and protect the internal structures of your body. Inhale to prepare, fill your diaphragm in a 3-dimensional way, and exhale on the working part of the exercise to turn on those deep core muscles.

Stabilize Your Shoulder Girdle

A stable shoulder is so important! To prevent injury and ensure you are working the goal muscles, we must first set our shoulder blades. Create width across the back at the shoulder blade (without pinching), and create openness or flatness across the front. Now your shoulder is protected and ready to move!

Engage That Core

To do this we need to hit a few very important cues. Close the rib cage down as if we were connecting it to the hipbones. From there we lift up on the pelvic floor, drawing those deep transverse abdominals up (like an elevator) and into the spine. Now add a light squeeze of the glutes, and that core is fired up and ready for movement. The core is your powerhouse. By engaging the core first and foremost before any exercise, you provide a safe base for movement.

Stabilize Your Pelvis

Your pelvis can be set in various ways:

  • Neutral (hip bone over pubic bone)
  • Anteriorly tilted (hip flexors lengthen, hip extensors shorten)
  • Posteriorly tilted (hip flexors lengthen, hip extensors shorten)

Starting in a neutral spine will help you maintain the proper curvatures of your spine, while having the least amount of stress on your joints.

Use Those Glutes

Your glutes affect everything! We need strong glutes to prevent movement dysfunction, pain, and injury. So, squeeze that bum! Glute strength is essential to aid and build strength in your lower half and core, while working to prevent low back pain.

Hit All Components of Fitness

We need to be well rounded to be a good mover. This means you need to be training for aerobic and anaerobic cardiovascular endurance, muscle strength, muscle endurance, as well as flexibility. Each component will complement the next. The goal is to be a lifelong mover and to do that we need to take care of our body across the board.

When you create a strong base of both the understanding and principles of movement, you are setting yourself up for success in any fitness
programming. You are moving towards a stronger, healthier you. We teach and reinforce these principles in every single session at GymClass. We believe in the power of intentional movement for life!

Teaching people how to move with confidence and strength is not something we take lightly. This is an honour for us, and we invite you to join us for your movement journey. Please enjoy a MONTH FREE of GymClass on us! To redeem, all you have to do is email hello@gym-class.ca and mention Stride. We meet you where you are and push you to be stronger. Let’s do this together.

-Brittany & Andrea

Click here to check out GymClass’ website for more information.

4 Tips for Preventing Back Injuries This Winter

4 Tips for Preventing Back Injuries This Winter

By: Devan Mercereau, Physiotherapist

As beautiful as they are, winters in our province are cold and snowy! Which leads to back injuries for a lot of reasons. When a storm hits, so does our responsibility to go outside and clear our sidewalks and driveways from snow. Most of us have been there; bundling up from head to toe, facing the grueling cold to clear our driveway, only to have to go out and repeat the whole process an hour later. As tedious as it is, rushing this annoying winter chore can have consequences. In addition to winter sports and icy conditions, shoveling snow can be the culprit behind many injuries this time of year.

Here are my top 4 tips for shovelling snow so you can stay safe, prevent back injuries, and enjoy all the great winter activities Alberta has to offer!

Tip #1: Body Position

Body positioning and proper mechanics are some of the most important aspects of any activity. I understand this as I have experienced issues with my own lower back from playing sports and growing up with scoliosis (curvature in the spine).

When shoveling snow, consider this checklist for proper body positioning and mechanics:

– Hinge at the hips

– Have a slight bend in the knees

– Place your feet about hip width apart, creating a larger base of support

– Keep the shovel close to your body to avoid reaching

– Avoid twisting and throwing snow

Tip #2: Mindfulness When Shoveling

Being aware of proper body positioning when shoveling can help prevent injuries. It’s easy to forget about maintaining good posture and body positioning when it is freezing cold and the snow is blowing all around. Shoveling smart and pacing yourself can help to avoid extra strains on the body. This correlates with tip #1!

It is also wise to think about the type of snow you are shoveling. Sounds strange, right? Even if the fluffy stuff seems effortless to move, it’s also easier to forget about proper body positioning, causing extra strain from repetitive twisting or movements. Similarly, wet snow can be heavy, creating an opportunity for overexertion and fatigue. Evaluate your conditions every time you go outside!

Finally, be aware of the amount of shoveling required. If you have a large driveway, taking small breaks throughout the process decreases the strain on the lower back from continuous repetitive movements.

Tip #3: Pushing Smaller Amounts of Snow

I know what you are thinking, smaller loads = more time shoveling! But the extra time investment could pay off.

Depending on the snowfall, the weight and density of the snow can change quickly. So, pushing smaller and lighter piles can decrease the load on your spine. Although it may take more time to remove, the decreased risk of injury may be worth it.

Tip #4: The Type of Shovel

A durable, lightweight shovel can decrease the load on the body when pushing snow around. Using a shovel with a curved handle also improves body positioning because it allows us to keep our spine in a more neutral position, rather than hunching forward over a straight handle. If your shovel is too big and cumbersome, try swapping it for a smaller model and embrace tip #3!

If you are experiencing any lower back pain or want to improve strength and conditioning for functional activities, feel free to reach out to our clinic or book an appointment online by clicking here.

Foam Roller 101: Usage and 10 Exercises to Try

Foam Roller 101: Usage and 10 Exercises to Try

By: Jen Goehring, Physiotherapist

Foam rollers: I bet you have heard this buzz word before! Perhaps you have seen that funny looking cylinder at your local gym, or in your friend’s living room. But, do you know how, when, or where to use it? Stick with me through this short post and I will teach you foam rolling basics, as well as my top 10 favourite exercises to release full body tension.

What is a Foam Roller?

Let’s start by answering this question. A foam roller is a dense cylinder that is used as a self-release tool to help get rid of tight muscles or knots. The purpose of foam rolling is to relieve tension and pain in your muscles, as well as increase range of motion. Firstly, you want to place the foam roller on an area of discomfort in your body. Secondly, slowly lower your weight onto it. Thirdly, hold your position for tension relief. Easy, right?

8 Basic Tips for Foam Rolling

  1. Foam rolling is best performed when you are warm, like after a warm-up or work out.
  2. For best results, foam roll a muscle group or area for 30 seconds to 2 minutes.
  3. Most important: only roll your muscles. Never use a foam roller over bone, joints, or your lower back.
  4. It is best to stay on a muscle with your foam roller until you notice a change in discomfort. This means you should feel relief. For example, if you start and the discomfort feels like a 5 out of 10, wait until it feels like a 3 out of 10. Then you can move onto the next area.
  5. Discomfort or soreness while foam rolling is normal. In fact, you want to use your roller on the worst spot you can find in a muscle group. However, pain is not normal. If you are rolling and it is painful, you should ease back.
  6. Foam rolling is most effective on larger muscle groups, as pictured below. Use a lacrosse ball or another self-release tool for fan-shaped or irregular-shaped muscles.
  7. There are two different techniques for foam rolling, both of which are effective. Option #1: Roll up and down on the area. Option #2: Place and hold the foam roller on one spot.
  8. There are many different positions that you could use for foam rolling the same area. Find a position that works for you.

Top 10 Exercises

Below are pictures of my top 10 favourite stretches and exercises to do with a foam roller. This routine will help you relieve tension from head to toe in about 10 minutes!

Thoracic Extension

– Support your neck with your arms while bringing your elbows in line with your ears (added chest stretch).
– Keep your bum on the ground with your knees bent to protect your lower back.

Lats Stretch

– Roll up and down on your side. Your lat muscles span from your shoulder to your lower back (these are huge muscles!).

Quadriceps or Thigh Stretch

– Roll from your hip to just above your kneecaps.

IT Band Stretch

– Use a tripod position to help offload some of your weight (both arms and opposite leg). This one is quite intense!

– Roll from your hip to just above your knee joint.

Groin Stretch

– Roll from your pubic bone to the top of the knee.

– This exercise takes a little bit of coordination – make sure you get your bottom leg out of the way and try to apply as much pressure downward as possible.

Hip Flexor Stretch

– Roll from below your belly button to your hip bones.

Shin/Outside Shin Release (2 Areas)

– Roll from below the knee joint to the top of the ankle.

– You can move side to side to get different parts of the muscle.


Glute/Buttock Stretch

– Get yourself into a figure-4 stretch, then lean slightly onto the side of the leg that is up.

Hamstring Stretch

– Put one leg over top of the other to get more pressure on the hamstring for a greater release.

– Roll from just below your sit bone to just above the knee joint.

Calf Stretch

– Put one leg over top of the other to get more pressure on the calf for a greater release.

– Roll from just below your knee joint to the top of the Achilles. Gently roll to both sides to relieve both heads of the calf muscles.

If you have any questions about foam rolling or need some self-release tools for your home rehab, you can book your appointment online by clicking here.

4 Exercises to Maximize your Mid-Back Mobility!

4 Exercises to Maximize your Mid-Back Mobility!

By: Julia Towers, Physiotherapist

Do you sit at a desk all day for work? Do you feel stiff or sore in your back? Extended periods of sitting can contribute to stiffness in your mid-back, which is also called the thoracic spine. Considering that many lifestyles today require us to move less and sit more, it’s important to exercise. In light of that, here are a few tips to relieve pain and mobility issues.

What is the Thoracic Spine?

The thoracic spine consists of 12 vertebrae, which are like stairs for your back. This is the largest area when compared to your neck and lower-back. Your spine is able to move in all planes of motion, although it is primarily responsible for rotation. It also helps to facilitate movement of the arms with its relationship to the shoulder blade, and provides a stable base for the neck. Furthermore, your spine is paired with your ribs to influence breathing. It is such an important part of the body that is often forgotten!

4 Exercises to Improve Thoracic Mobility

Build these into your daily routine to reduce and/or prevent mid-back mobility issues and stiffness. These are also great exercises to add into your breaks during the workday.

1. Extension Over a Foam Roller [1]

    1. Place a foam roller (or towel) at the level of your mid-back on the floor, starting at the top of your shoulder blades
    2. Support your neck with your hands as you lean back, extending over the roller
    3. Continue to move the roller down about an inch in order to target different segments of the mid-back
    4. Repeat the exercise for 5 repetitions
Reference: (2)
Reference: (2)

2.  Cat-Cow Stretch [1]

    1. Start on your hands and knees (shoulders directly over your hands, hips directly over your knees)
    2. COW: Inhale as you drop your belly button towards the floor, curving (or extending) your back
    3. CAT: Exhale as you push your back upwards towards the ceiling, rounding (or flexing) your back
    4. Alternate between these positions in a slow and controlled fashion for 15 repetitions
Reference: (3)
Reference: (3)


3. Open Book [1]

    1. Lie on your side with your top knee bent and arms out long in front of you
    2. Draw a large arc with your top arm as you bring it out to the opposite side
    3. Think about this movement coming from your mid-back as you try to touch your shoulder blade to the floor behind you
Reference: (4)
Reference: (4)


4. Wall Angels [1]

    1. Stand against a wall with your feet away from the baseboard and a soft bend in your knees
    2. Raise your arms with palms out to make contact with the wall
    3. Your shoulders and head should also touch the wall
    4. Slide your arms up as far as you can without allowing any body parts to come off the wall, then slide back down
    5. Repeat this exercise for 15 repetitions
Reference: (5)
Reference: (5)


*With any of these exercises, go as far as you are able to without pushing through pain. Over time and with practice you will find that you are able to go further. *

Manual Physiotherapy treatment can also help to alleviate stiffness and pain in the back. Feel free to reach out if you have any additional questions on the subject or you can book an appointment online by clicking here.

References:

    1. Physitrack (2012). Thoracic Mobility. https://ca.physitrack.com/exercises
    2. Thoracic extension stretch, over roller, hands behind neck, supine. https://ca.physitrack.com/exercises
    3. Cat and Camel. https://ca.physitrack.com/exercises
    4. Trunk Rotation Stretch, Leading with arm, Side lying. https://ca.physitrack.com/exercises
    5. Wall Angels Scapular Stabilization, standing. https://ca.physitrack.com/exercises

Joint Cracking – What’s Going On?

Joint Cracking – What’s Going On?

By: Eric Walper, Physiotherapist

Like many of you, I find the phenomenon of joint cracking fascinating. You all know what I’m talking about. It’s the popping sound we hear after the feeling of satisfaction when we crack our knuckles and backs. Especially as kids. How many times did our parents and grandparents tell us to cut it out? They believed the cracking was somehow bad for our bodies, and would then result in arthritis.

Were they right? Well, let’s find out, courtesy of two studies that explore this phenomenon.

What’s really going on with joint cracking

Joints are areas where two bones unite, often lubricated by fluid. In 2015, researchers at the University of Alberta [1] watched what happened when a joint popped, using real-time MRI imaging. This was the first time in history that a joint was observed internally while the actual pop occurred. Thanks to research, we know that as a joint is pulled apart, an open space develops within it, up until we hear a cracking sound. The amount of force or effort is proportionate to the amount the joint stuck together.

If you need help visualizing this process, think about a Chinese finger trap. As you start to pull your two fingers apart in the trap, it becomes harder and harder to pull because the force of the two fingers are opposing one another. Eventually, you will pull hard enough to pop one of the fingers out, similarly to when you crack a joint. Essentially, we know that the cracking noise is due to the creation of an air bubble within the joint.

Is cracking your knuckles actually bad for you?

Now we get it, but is cracking our knuckles actually bad for us? In 2004 [2], an interesting study was published. In this study, a researcher cracked his knuckles on one hand daily for 60 years, while leaving the knuckles on his other hand completely untouched. What the researcher discovered was that there was zero difference in functionally between both his hands. When both hands were imaged to compare to one another, there was no significant difference. In summation, this study retired the myth that knuckle cracking causes arthritis.

What does this mean?

These two studies are important to me for a couple of reasons:

  1.  It helped me understand where the noise within a cracking joint actually comes from.
  2.  I learned that sound has less to do with re-aligning a joint, and more to do with pressure changes within the joint.
  3.  With respect to health and safety, we can fairly confidently say that extended joint manipulation over a period of time will not have adverse effects on its health. This is an important consideration for us as practitioners, and you as patients going about your daily lives.

Feel free to reach out if you have any additional questions on the subject! Or you can book an appointment online by clicking here.

References:

[1] Kawchuk et al., PLoS One 10 (2015) e0119470.

[2] Unger DL. Does knuckle cracking lead to arthritis of the fingers? Arthritis Rheum. 1998;41:949–950.

6 Tips to Create a Comfortable Home Office

6 Tips to Create a Comfortable Home Office

By: Laurin Walton, Physiotherapist

Since Stride’s doors re-opened in May, patients have been coming in with sore necks, upper backs, shoulders, and arms. The majority of these body aches and pains are related to people working from home, due to the COVID-19 pandemic. I often ask patients what their home office area looks like, then I come up with ideas to help them create a comfortable home office. Today, I am sharing six of my home office tips with you!

6 Tips for Setting Up Your Home Office

If you’re going to be working from your home office for the foreseeable future, you will likely be looking at a computer screen a lot. Following the tips below will help you avoid subsequent body aches and pains. In the long run, a few small adjustments will pay off as you spend more time at your desk!

The 90-90 Rule

Your hips, knees, ankles and elbows need to rest at an angle of approximately 90 degrees. This will likely require changes to your desk or chair height. If you can’t change your desk height, you can raise your chair to ensure your elbows are angle at 90 degrees. You may notice your feet are too far from the floor, so look at a box or footrest to keep your hips, knees and ankles at the same angle. If neither your desk or chair adjust, try a keyboard tray to allow your keyboard and mouse to get your elbows at the ideal angle.

Maintain Good Posture

Our bodies are not meant to sit for hours. Doing so makes it difficult for us to maintain good spinal posture. Allow your chair to support you by sitting with your hips all the way to the back of the chair. If your chair has lumbar support (support for your lower back), relax into it. If it doesn’t, you can roll up a towel, or purchase a lumbar roll to help maintain the curve in your lower back. Think tall and don’t let your chin poke forward. Check out this video on correcting your posture for more tips.


Ensure Your Screen Is In a Good Position

Your computer screen should be approximately one arm’s length away from you, and the top line of it just below your eye level. If your screen doesn’t adjust, then you can put it on some books. Alternatively, you can invest in a monitor stand for your home office.

Keep Your Upper Arms Close to Your Body

Shoulders, elbows, wrists, and hands should be kept close to your body. You can achieve this by adjusting your armrests to a level that allows your arms to gently rest on it. This will help your shoulders relax. Place your mouse and keyboard at the same level, so you can use both in the optimal ergonomic position. Your hands should be at, or below, elbow level with your wrists in neutral positioning. You don’t want your wrists to be bent backwards towards you.

Using a Laptop

Laptops are great for portability, but aren’t always practical if you have to work with one for a long period of time. An external keyboard and mouse are helpful in creating a comfortable home office. Place your keyboard and mouse at a level that is good for your arms, then put your monitor in a spot that is best for your neck. You can prop your laptop up on some books or a stand to get the screen to the proper level.

Set Reminders

Most important, do not to stay in the same position for an extended amount of time. Use your phone or computer to set reminders to check your posture, then take breaks away from your desk by walking around or stretching!

Those are my six best tips for creating a comfortable home office! Feel free to reach out if you have any additional questions. Additionally, if you are struggling with working remotely comfortably, book your appointment online by clicking here.

To Brace or Not to Brace? Ankle Braces 101

To Brace or Not to Brace? Ankle Braces 101

By: morgan Schultz, Athletic Therapist

To brace, or not to brace: that is the question! Particularly with ankle braces. As an Athletic Therapist, I often get asked about bracing and taping for acute and chronic injuries. I also educate about injury prevention. Today, I am going to take some time to discuss when you should and when you should not brace ankle injuries. More specifically, ankle sprains.

Ankle Sprains Are a Common Injury

Ankle sprains are common, especially for sports injuries. In fact, 1 in 1000 people will suffer from an ankle sprain in their lifetime. Additionally, one to two thirds of those people will have lingering problems. When you roll your ankle and sprain it, the outside (lateral) or inside (medial) ligaments get damaged. These ligaments are the structures that help stabilize the ankle joint from side to side. Common acute symptoms of a sprain are swelling, bruising, and pain. However, the longest-lasting complaint following a sprain is the lack of stability of the joint. This instability is what needs to be treated to successfully return to sports or physical activities.

This is where bracing comes in

As an Athletic Therapist, I have mastered the ankle tape job, due to how prevalent taping is in the world of athletics. Initially, someone recovering from an ankle sprain must have the support of tape while they are gradually returning to their sport. However, after the ankle has had some time to recover and strengthen, the athlete can transition to a brace. A brace provides the same concept of support, just to a lesser degree.

So, we ask: Is it necessary to put an individual into a brace even though structurally the ankle is strong, stable, and healed? Listed below are arguments for either side of this question:

 To Brace: 

– Prevents recurrent injury

– Mentally allows the athlete to feel safer

 Not to Brace: 

– Ankle begins to rely on the brace which leads to muscle weakness

– Restriction of motion from the brace impairs performance

– The user becomes mentally reliant on brace

– Immobilizes the joint less than its normal  ability

– Causes knee, hip, and lower back issues

There is no doubt that bracing the ankle protects it from a further or recurrent injury; whether that be physical or mental for an individual. But are these reasons strong enough to outweigh the extensive list of reasons not to brace?

Our Approach to Using an Ankle Brace

I believe it comes down to the person who sustained the injury, their level of activity, and the degree of the injury. Each of my actions is based on my patients’ needs, which has led to a customized approach to care. Consequently, I can sway either way in this argument. If there is a psychological component, then I will recommend someone to brace if it means they can get back to the activity or sports they love. However, I have also read about reasons not to brace; because of this, I guide my patients through a rehabilitative program where they do not have to rely on an ankle brace. This is done using the proper modalities and exercise therapy.

In summary, there are certain instances where bracing long-term makes sense, and some situations where it does not. The simple answer is – it depends!

Feel free to reach out if you have any additional bracing questions or you can book your appointment online by clicking here.

Home Remedies for Tension Headaches or Migraines

Massage Therapy

Home Remedies for Tension Headaches or Migraines

By: Cheyanne Heyn, Registered Massage Therapist

Many of our clients suffer from tension headaches or migraines. Subsequently, it is difficult to differentiate between the two, and the pain can intense.

Here are some facts about headaches and migraines and the differences between them.

What are Tension Headaches? 

 – Up to 63% of men and up to 86% of women experience tension headaches.
 – Chronic tension headaches occur in 3% of people.
 – There is a family history in 40-50% of these headache sufferers.
 – Tension headaches often begin in early adulthood.
 – 004% of all headaches are due to a serious problem.

What a Tension Headache Feels Like 

 – Pain is on both sides of the head and is constant. The pain can be described as dull or like your head is in a vice grip.
 – Pain is felt in the neck, forehead, back of the head, shoulders, and sometimes into the jaw.
 – The headache can last from 30 minutes to weeks. Chronic tension headaches last for more than 15 days.
 – These headaches typically begin in the afternoon, after tight muscles have been activated.
 – Potential associated symptoms are as follows: muscle tenderness, stiffness, loss of appetite, nausea, vertigo, and ringing in the ears.
 – Aggravating factors for tension headaches include stress, fatigue, cold temperatures, low blood sugar, poor posture, and decreased range of motion in head and neck.

Migraine Statistics

 – 25% of women and 8% of men are affected by migraines.
 – There is a family history in 70% of those who suffer from migraines.
 – These headaches can begin in childhood, adolescence, or early adulthood.
 – Migraines affect 5% of children.
 – In early childhood, more boys are affected, and in adolescence, girls are more affected.

What a Migraine Feels Like 

 – The pain can feel like your head is pulsating, with moderate to severe intensity.
 – Pain is on one side of the head 60% of the time, and often begins as a dull ache or sensation of pressure. This gradually localizes to one place. Intensity then increases over several minutes or hours.
 – Pain locations can include on the sides of the head, neck, ears and behind the eyes.
 – Physical exertion may worsen symptoms.
 – Frequency is rarely greater than once per week.
 – Symptoms last for 4-72 hours.
 – The onset of migraines is variable, with early morning onset being the most common.
 – Potential associated symptoms: muscle soreness, hypersensitivity to light (photophobia) or sound (phonophobia), temporary vision loss, seeing spots or flashing lights, autonomic nervous system dysfunctions (nausea, vomiting, diarrhea), cold extremities and sweating.
 – Usually, the headache resolves over several hours during sleep or rest. However, there may be vomiting or intense emotional release abruptly ending the migraine.

Home Remedies for Your Headache Pain!

 –  Rest and change positions.
 – Apply a cold pack to your head/neck and heat to your feet (during a  – headache).
 – Apply heat to your neck, back, and jaw muscles (in-between headaches).
 – Try some self-massage on your neck and upper back muscles (or use a foam roller or lacrosse ball).
 – Perform slow and pain-free stretches of the neck.
 – Apply peppermint oil to temples, back of neck and/or add into your shampoo during headaches.
 – Massage and gentle hair pulling to loosen the scalp.
 – Prioritize self-care (bubble baths, massage, facials).
 – Drink 8 cups of water every day.
 – Aim for 8+ hours of sleep.

If you need additional information, a consult or help managing your headaches then please feel free to reach out to one of our team members at Stride! You can book your appointment online by clicking here.

Stay healthy, stay happy.

Cheyanne

Acupuncture VS. Dry Needling

Dry Needling at Stride Physiotherapy and Wellness

Acupuncture VS. Dry Needling

By Blake Goehring, Physiotherapist

You’ve heard of acupuncture and dry needling, but did you know there is a difference between the two? Dry needling is the act of inserting a needle into the body without the passage of fluid. For example, when you get a booster shot, there is a fluid that is injected into your body through the needle being used. Or when you get blood, there is fluid being taken from your body. A dry needle is simply a tiny piece of steel that is so small, it’s actually fractions of a millimetre in thickness. In dry needling, this tiny needle carefully slides through the skin into a targeted area of tissue to provide tension or pain relief.

Acupuncture is a form of dry needling, but not all dry needling is acupuncture! Sometimes, dry needling involves IMS, which stands for “Intramuscular Stimulation.” Let’s explore.

What is Acupuncture?

Acupuncture follows your body’s map. Where and how deep the needles go are based on this map, which outlines 12 different energy channels of the body. From a Traditional Chinese Medicine (TCM) perspective, energy termed “Qi” (pronounced “Chee”) flows through these channels. Acupuncture is performed when these channels become blocked or obstructed. From a Western Medicine perspective, the needles are inserted into areas close to your body’s nerves. Acupuncture aims for three things: One, it helps your nervous system to stimulate healing. Two, it promotes blood flow. Third, it helps support your body’s immune system.

What is Intramuscular Stimulation (IMS) or Functional Dry Needling (FDN)?

Intramuscular Stimulation, or Functional Dry Needling, uses a similar needle to the needle used for acupuncture, but with a vastly different technique. IMS/FDN targets trigger points, called “knots,” that have built up in local areas of a muscle. You’ve probably felt these before. Picture the following: a trigger point happens when a small, contractile unit of the muscle gets stuck and cannot relax. It feels like a literal knot in your muscle. More specifically, this might feel like a taut, fibrous band when you rub your fingers over a tender spot. IMS/FDN targets that trigger point, and then elicits a muscle twitch, with the goal of releasing the knot. This is essentially resetting your muscle.

Does it hurt?

Acupuncture and Dry Needling feel quite different once the needle penetrates the skin. Acupuncture is often painless. Sometimes, patients feel mild aches when the needles are in for a length of time. In contrast, dry needling causes a muscle to twitch, which is sometimes painful or causes a deep ache. Dry needles can take it a step further with stimulation, too! This happens when we attach cords to the needles, which send a small electric current to the area of pain. As a result, this gives the area an extra helping hand in releasing tension.

Which type of needling is right for me?

Of the two needling techniques, acupuncture is typically more mild and can be better for more acute situations, such as swelling and inflammation. If your problem is chronic, or your tissue causing problems is deep, then dry needling might be the better approach for you.

At Stride, our therapists know what to thoroughly assess in order to address your needs! We aim to find the most effective form of treatment, personalized for you. To learn more, call 403-343-8891 or book your appointment online.